

This week, The Daily Post wants me to detail a three to five step process, and illustrate each of the steps with something visual. I’m going to show you how I draw stuff on the computer in Illustrator. Today, we’re going to make an animal. How about a giraffe?
Contrary to the title, this post probably won’t help you draw a giraffe.
I’m not going to draw a realistic giraffe. I’m going to do one in my own style. Here are some other animals I’ve drawn (note the goldfish), so you have an idea of what style we’ll end up with:

They’re all different, but together, they represent my drawing style. When you see them all together like that, you can probably guess that they were done by the same person.
Let’s get started with our giraffe.
Step 1: Research
It may seem like overkill to research giraffes when I’m just doing a simple giraffe drawing, but when drawing something that exists, I find it’s best to look at the real thing for inspiration lest you end up with a giraffe with the head of a lion. This picture gives a pretty good idea of what they look like from the front and side:

They are strange looking, aren’t they?
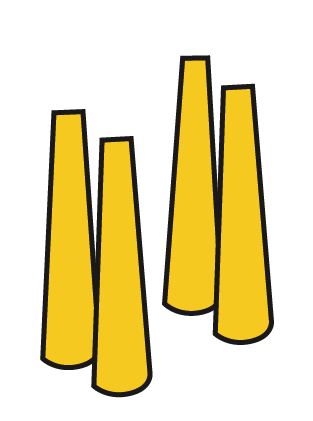
Step 2: The Body
The main features of a giraffe are a roundish body, long legs and a very long neck. I’m going to start with those. I drew one leg and copied/pasted it three more times, which is why I love drawing in Illustrator. You cannot copy/paste like this when you draw on paper:
Then to draw the body and neck, and we have a basic giraffe body without a head:

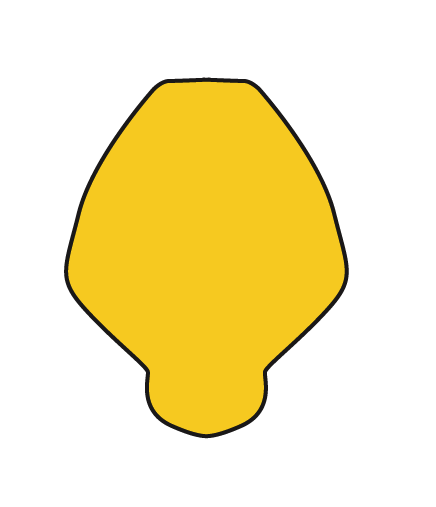
Step 3: The Head
The heads are usually the hardest part. Generally, with the head, I do the same thing I did with the body, which is to pick out the most prominent features and start there. Let’s see what a giraffe head looks like:

They’re goofy looking.
I’m not trying to create an exact image of a giraffe head, but an overall impression of giraffiness, so some features will be exaggerated. They have a basically diamond-shaped head:
Big ears:
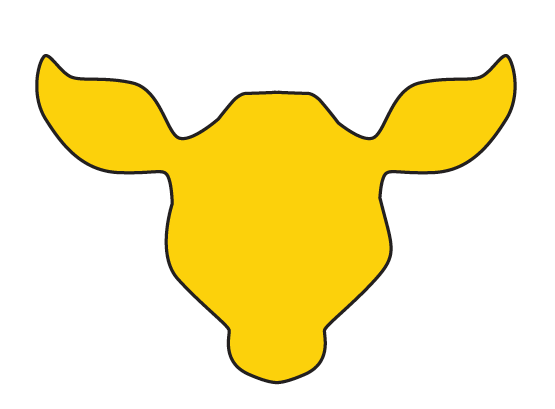
Weird knobby things on the top like antennas:

And little slits for nostrils:

Then, big eyes and details on the ears:

And Voila! Giraffe head. For all the parts of the head, I created one half and then copied, pasted and flipped it to create the other half so that it’s symmetrical. Now let’s put it on the body and see how it looks:

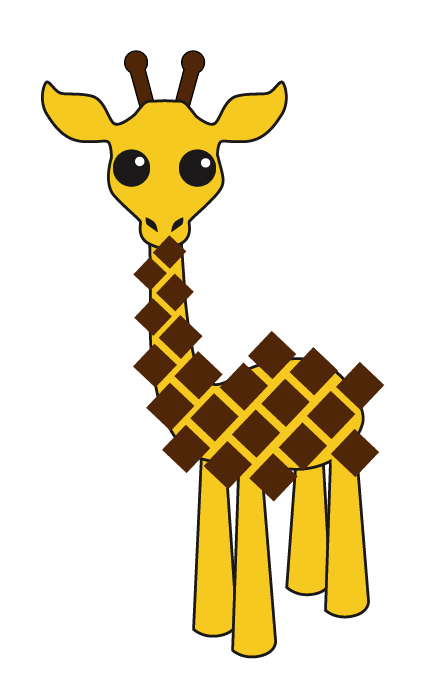
Yay! I’m pretty happy with it, but we’re not done yet. The giraffe doesn’t have any of its distinctive markings.
Step 4: The Pattern
I’m going to use a diamond pattern, which is really just a square turned 45° and copy/pasted a bunch:
Now to tuck in the ends so we are only coloring between the lines:

And finish the legs:

Step 5: Finishing Touches
I decided that the dark brown was too glaring for my giraffe so I changed it to a lighter orange. To finish it, I added details like hooves, a tail and a background color…
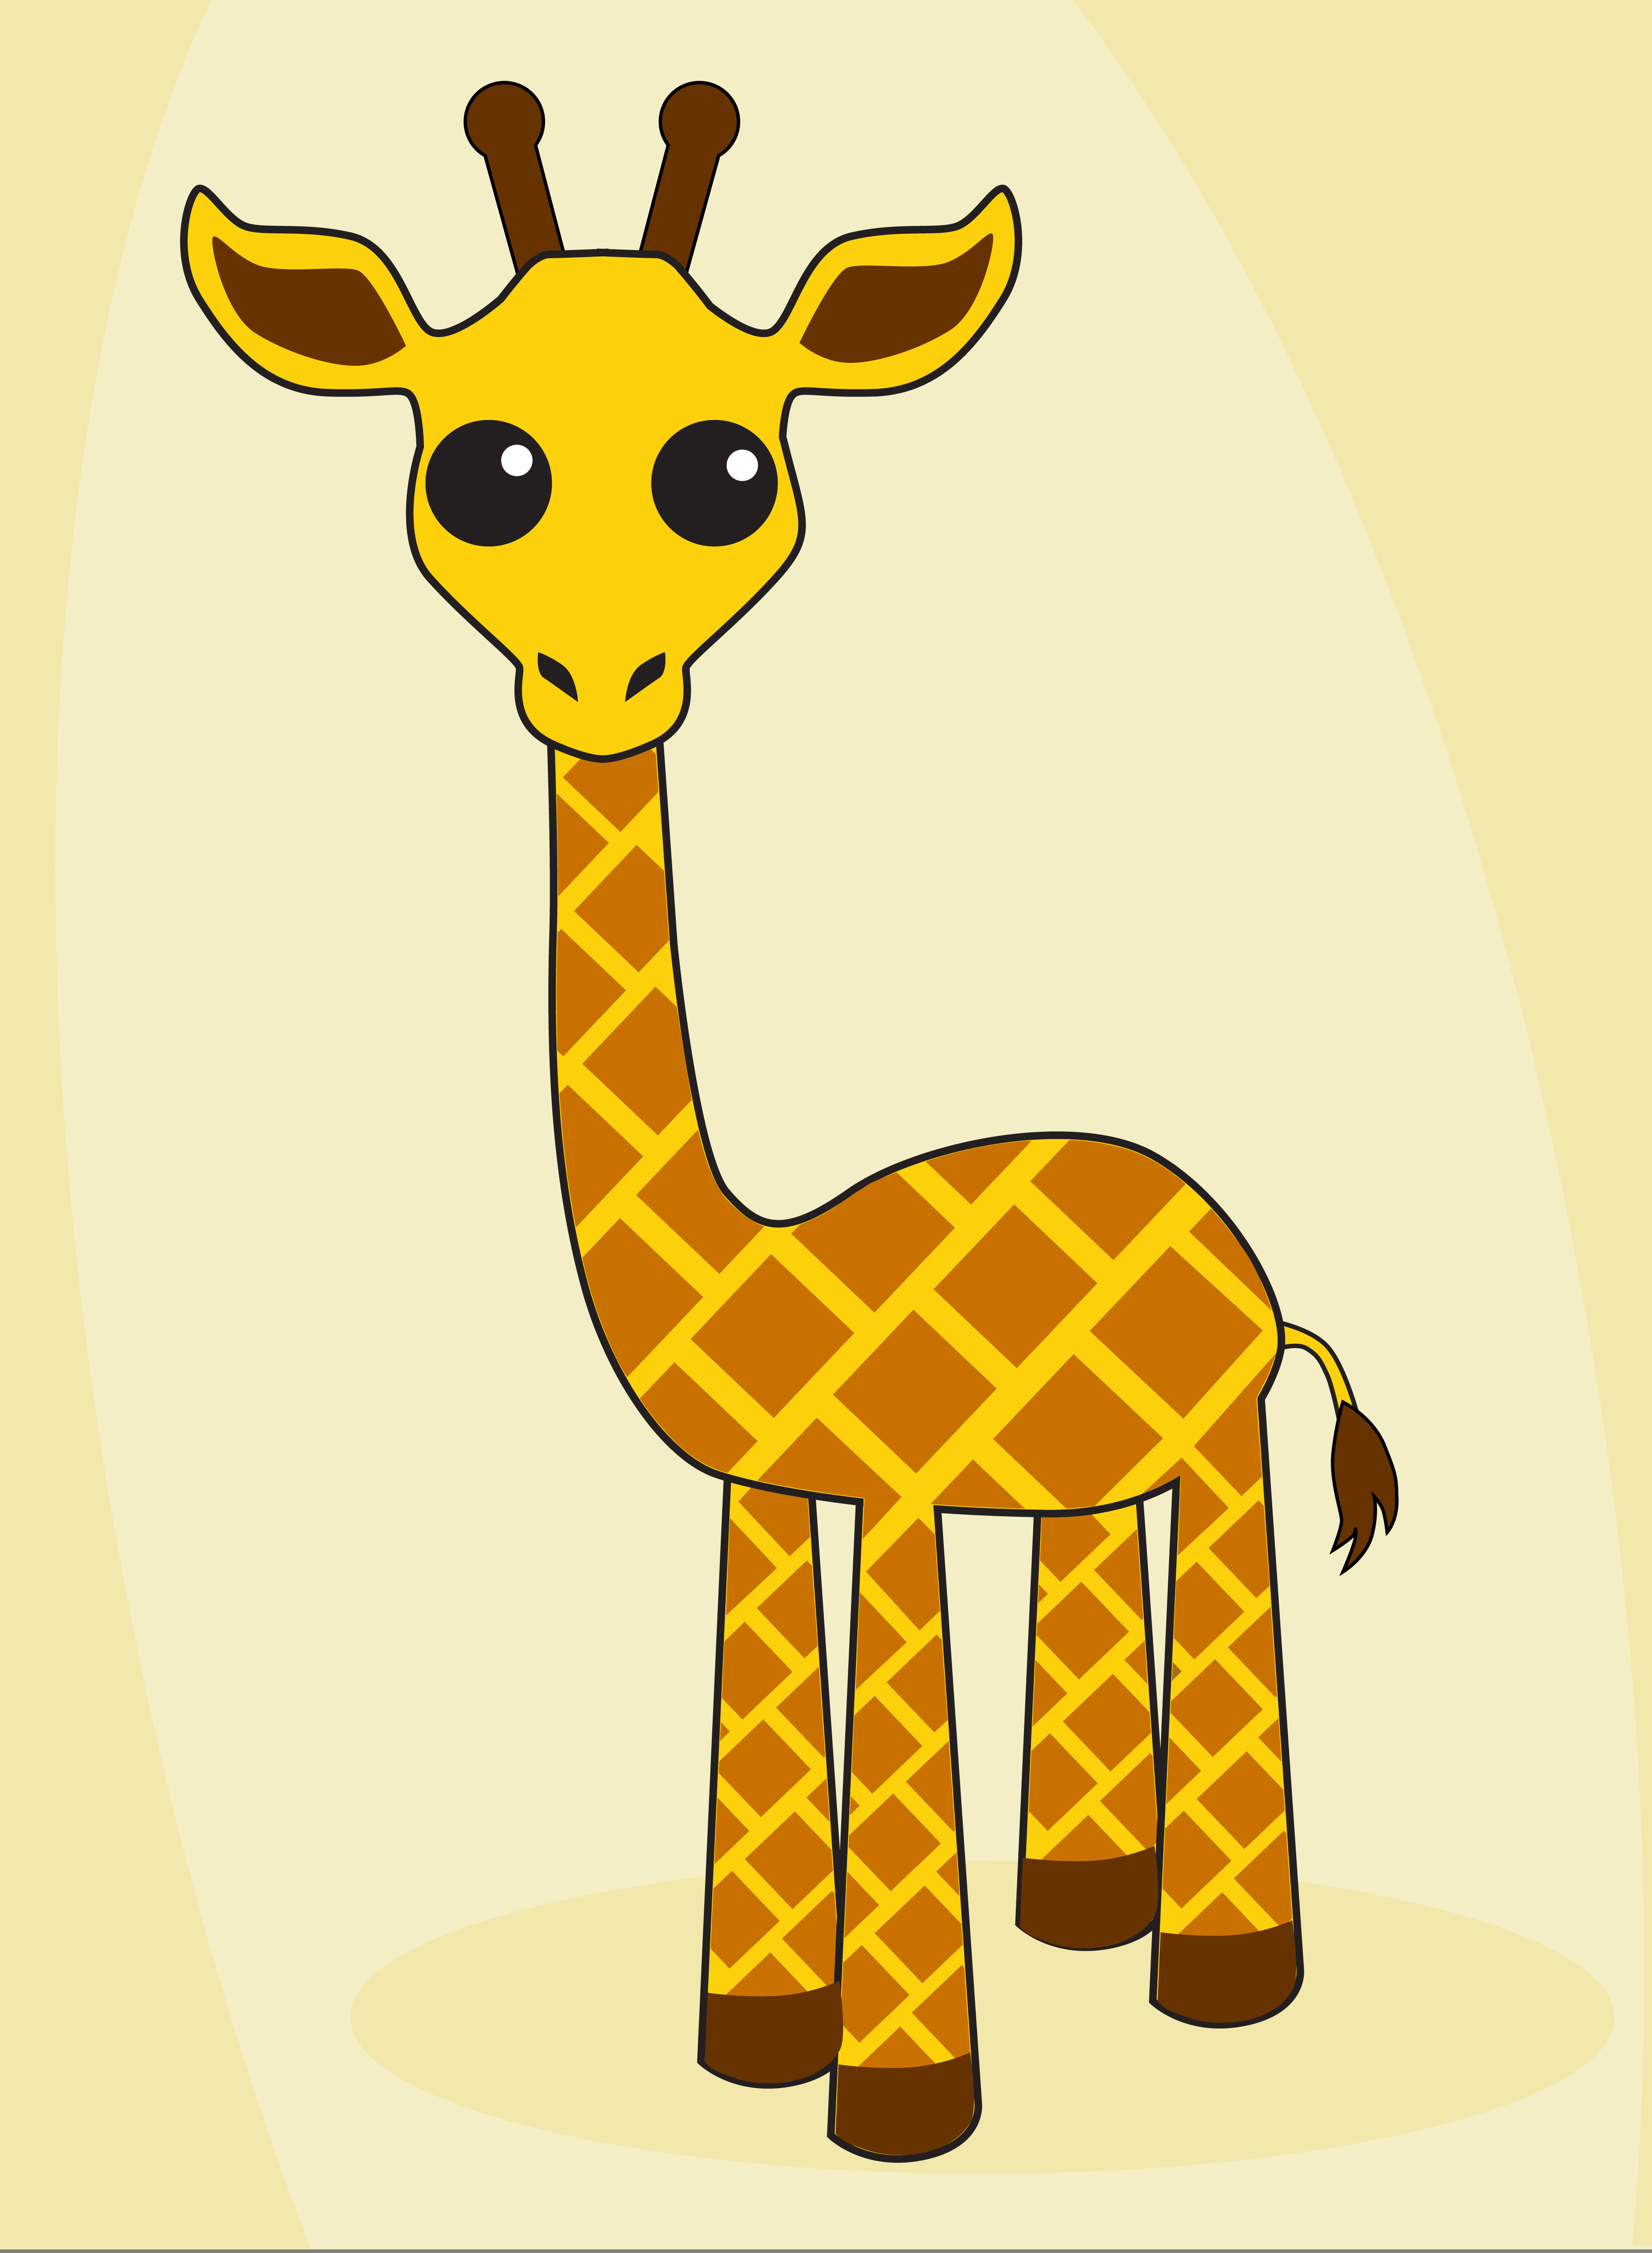
…And we have giraffe! Giraffe is go. What should we draw next?
You may purchase Mr. Giraffe over at my Redbubble store on a selection of fine products.
